Northgate
Contents
Introduction
This document is designed to give an overview of the interface between Inter•Viewand Northgate (formerly Sx3) applications, what each component does and how to make configuration modifications to specific customer requirements.
History of Northgate / Omfax relationship
Omfax Systems Ltd established a business relationship with Northgate in mid 2005. Northgate aquired Sx3 in 2005 with their Sx3 Housing Management software. Although Northgate have a repairs module which uses 'Repair Finder' (a graphical SOR selection tool) within the Sx3 Housing application, Birmingham City Council approached Omfax Systems and Northgate to allow the Keyfax Repairs Diagnostic scripting system to feed data into the Sx3 Housing repairs module, in place of 'Repair Finder'.
In late 2005 Keyfax was adapted to exchange data with web services in response to Northgates request.
Overview of Northgate interface
Northgate applications (Sx3 Housing) use a specific integration module (Northgate Integrator) to integrate 3rd party applications and Plug-ins. This uses an requests and responses through XML via web services using SOAP over HTTP.
Inter•View incorporates a web service, which can receive XML requests via it's own web services using SOAP over HTTP. This will invoke a Inter•View session, provided the request is validated correctly.
Exchange Process
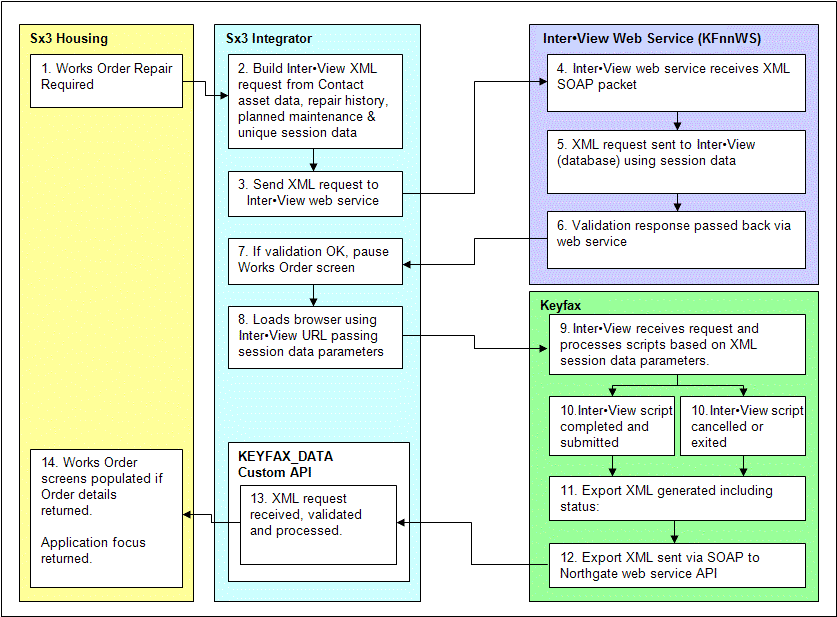
The Sx3 Housing applications have integration code to support the Inter•View web service. The basic principles utilised in the exchange process are illustrated below. Note that KFnnWS refers to either the Keyfax 3.2 or Inter•View 4.0 version of the Web Service.
The numbered steps above are explained in more detail below:
- The Sx3 Housing application receives a repair request call from a tenant or caller.
- The Sx3 Housing application calls the Sx3 Integrator to create XML instructions to pass to Inter•View. This includes details of tenant, their property (asset), repair history and planned maintenance.
- The Sx3 Integrator adds a unique session ID, and wraps the XML data in a SOAP envelope and passes to the Inter•View web service.
- The Inter•View web service (KFnnWS where n = version no.) receives the XML SOAP request and extracts the Inter•View request data.
- The Inter•View web service puts the Inter•View request data in the Inter•View database, using the Sx3 unique session ID as the key.
- The Inter•View web service validates the XML data, and returns a status in the SOAP request response.
- The Sx3 Integrator processes the SOAP request response, and if OK, will pause the Sx3 application while the Inter•View is processed.
- The Sx3 Integrator loads an Internet Explorer window to the Inter•View URL to begin the diagnostic script.
- The Inter•View application guides the user through a repair diagnostic.
- Inter•View completes and generates repair data to export, or the user cancels a script / exits the application.
- Inter•View builds a return XML packet, and includes the Inter•View status (1 = Complete, 2=Cancelled, 3=Exited).
- Inter•View wraps the XML packet in a SOAP envelope and sent it to a Sx3 web service, where the Sx3 KEYFAX_DATA API will process the results.
- The Sx3 Integrator validates the XML packet, and returns a validation response to Inter•View for logging.
- The Sx3 Housing application receives focus back from the Integrator and if Works Order data is received; displays a new Works Order populated from Inter•View data.
XML/Field Mappings
Northgate use their Sx3 Integrator to 'Map' the Inter•View export XML data elements to their Sx3 Housing application Works Order form fields with XML templates. The exact mapping requirement is defined by the Northgate customer. Word documents(available on request) define exactly which export XML elements go where.
Launching Inter•View
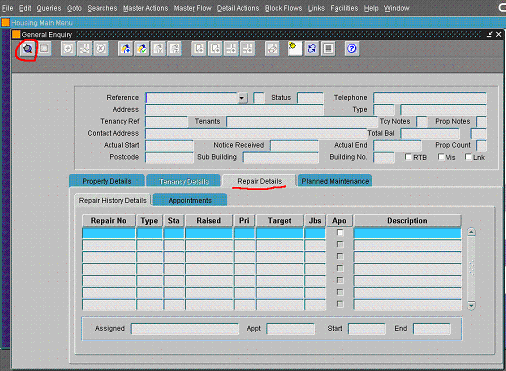
From the main menu click the ‘General Enquiry’ link.
Click the Repairs Details tab, then click the Search button in the top left (highlighted below)
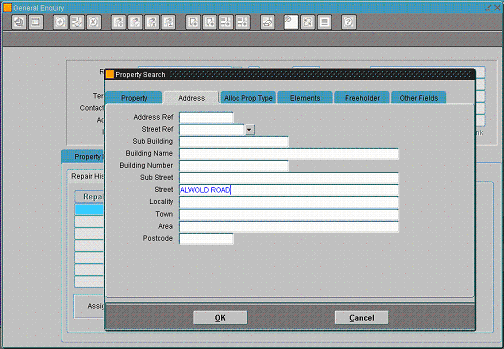
Enter search details and OK
Choose an address from the returned list.
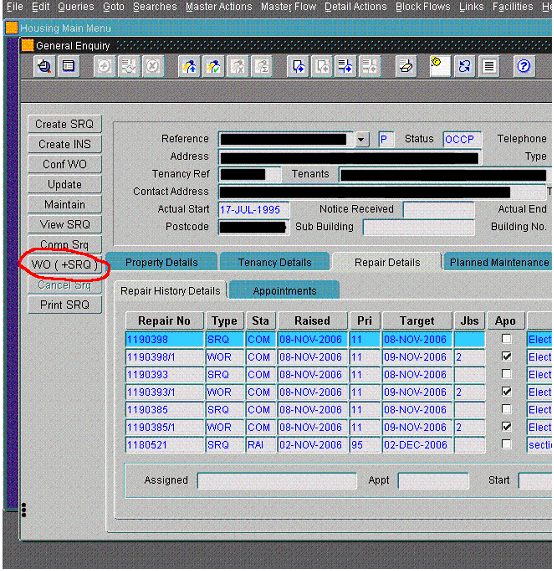
When the repairs details for the address chosen appear you can click on the WO ( +SRQ) button on the left hand side: -
You don’t need to change anything on the first page of the Create Works Order and Service Request wizard, just click Next.
On this screen just click on the Repair Finder button and Inter•View should launch.


