Master Scripts
Contents
Master Scripts
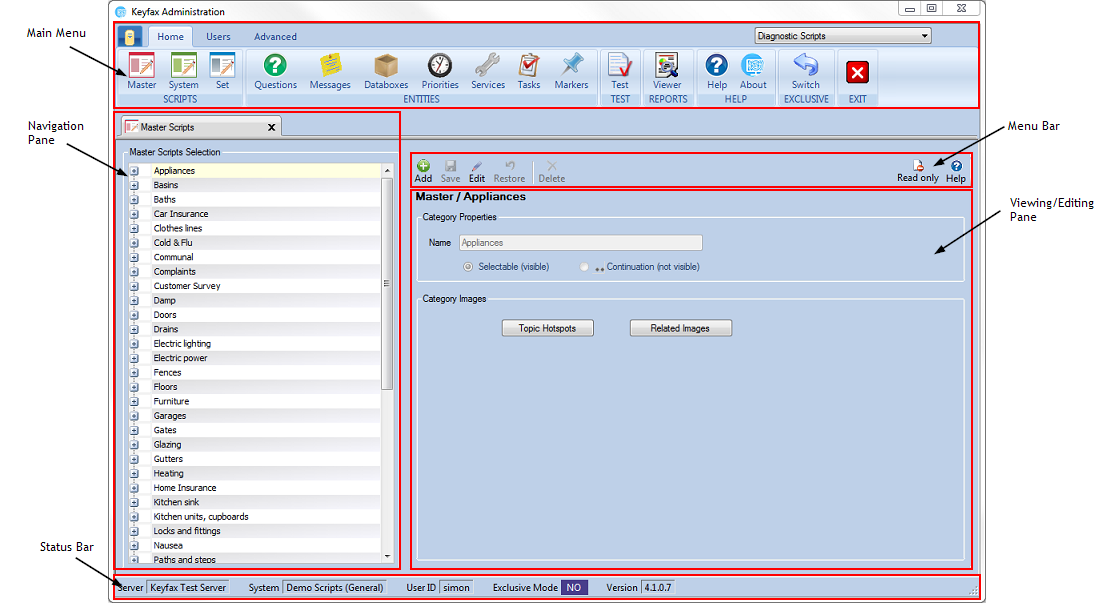
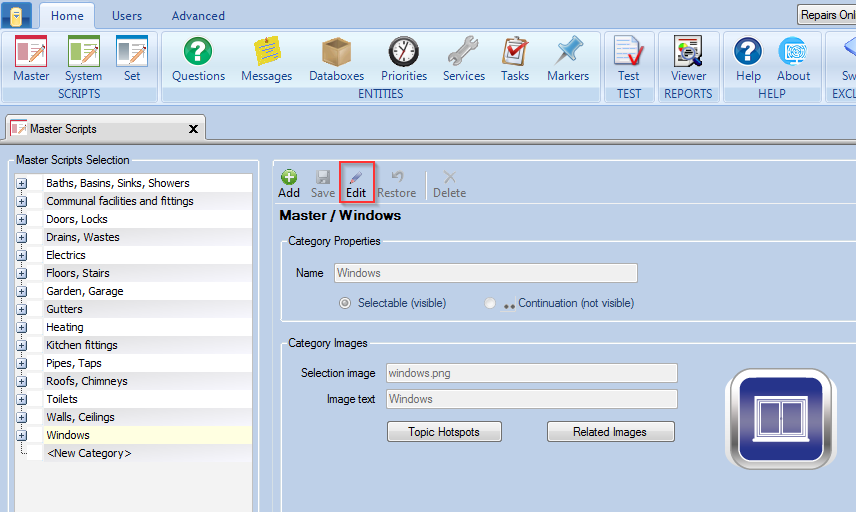
Select Master Scripts from the Scripts menu to open a new tab.
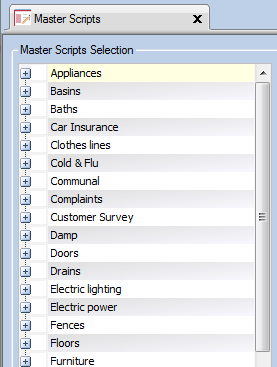
Shows the Script Categories. These can be opened up to show the list of Topics by clicking + to the left of each Category.
Script Categories
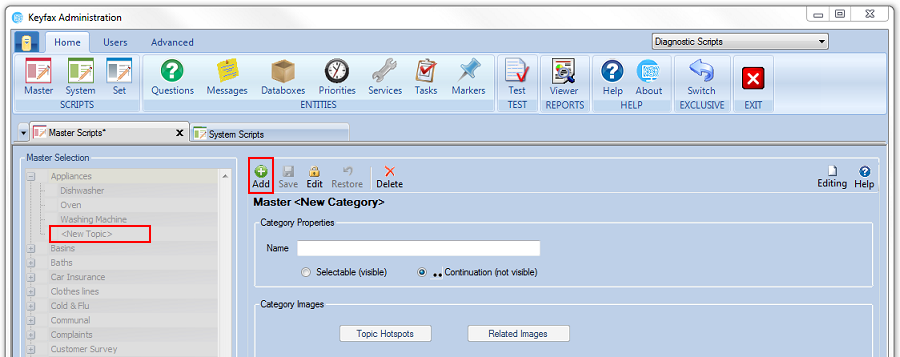
The Navigation Pane displays the Script Selection containing a list of the Categories already set up and listed alphabetically. The Category Properties are displayed in the Editing Pane.
Script Categories and Topics must be created at Master Script level to be available at Script Set level.
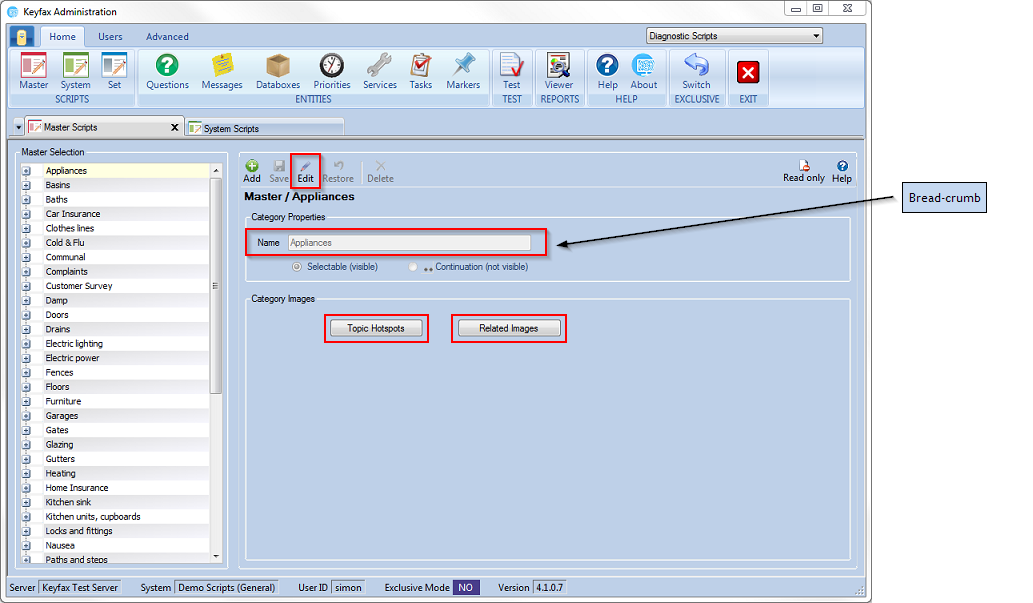
To edit an existing category, select the category and click on ‘Edit’ on the Menu Bar.
Script Topics
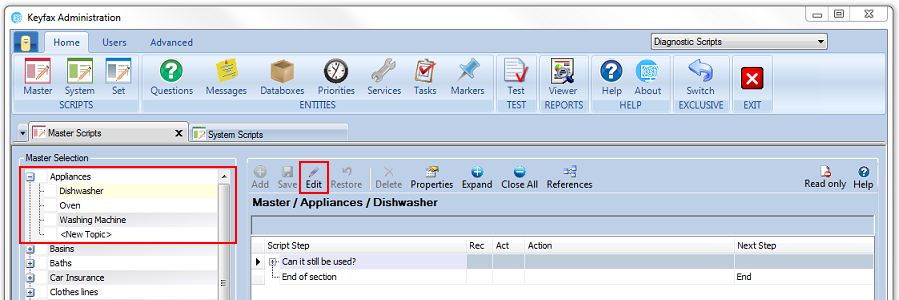
In the Navigation Pane, double-click on a Category or select the + sign to the left to open the list of Topics. Select a Topic by clicking on the relevant topic heading which will open the script grid for that topic. To edit an existing Topic click Edit on the Menu Bar.
To add a new Topic click on the <New Topic> tab at the bottom of each category list, or click Add on the Menu Bar, which will open the Topic Properties pane for your new topic area. This will automatically take you into Edit mode. Topics are added to Categories at the Master Script level.
The Menu Bar
Shows icons for editing the selected Script.
Add - adds a new Script Category/Topic to the system. Alternatively click on the <New Category> tab at the bottom of the Category/Topic list in the Navigation Pane. Enter the relevant information in all the appropriate fields then click Save to finish creating the New Script Category
Save - saves changes. This will only appear if changes have been made.
Edit - allows changes to be made to the selected Script. Once selected the icon will change to Edit with a lock above it to show the script is locked for editing and the Read only icon will change to Editing. Click again to stop editing without making changes.
If the edit tab is greyed out, this is because you are editing in another tab.
Restore - restores the Script to the last saved position.
Warning: This is NOT an undo button. Selecting this will delete any amendments made since the last save.
Delete - deletes the selected Script. This will be greyed out unless you are switched into Exclusive Mode.
Category Editing Pane
Allows you to edit the content of the scripts by Category
Category properties
- The Bread-crumb is displayed at the top of the Editing Pane.
- Name - the displayed name of the Category
- Selectable (visible) - if this button is checked the Category is visible to the operators
- .. Continuation (not visible) - if this button is checked the Category is not visible to the operators and would be used as a continuation script, linked to a visible script.
Category Images
Topic Hotspots
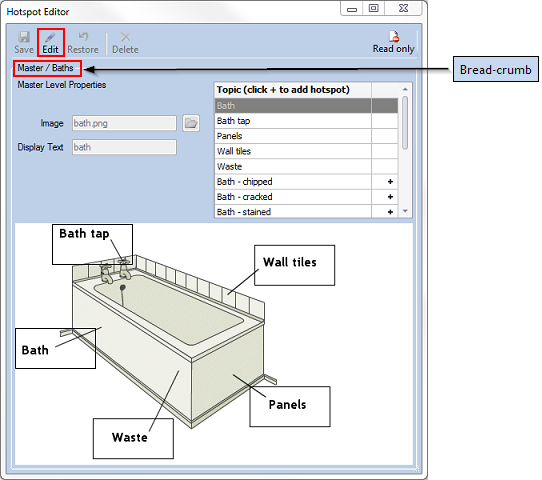
Hotspots can be used with images to link to Topics within the selected Category. Images with ‘Hotspot’ areas can be added to the Script, which will be displayed to the Operator as they select a category. By selecting a Hotspot, Operators are selecting the associated Topic. Click on ‘Topic Hotspots’ which will open the Hotspot Editor in a new window.
The Hotspot Editor
Allows editing of images to be used within the scripts. To make any edits, click on Edit on the Menu Bar.
- Breadcrumb – this displays the current selected Category and confirms that this is held at Master level
- Image – identifies the image file being used – default images are ‘png’ format. ‘Gif’, ‘bmp’ and ‘jpg’ format can also be used.
- Display Text – the name displayed to Operators
- Topic – displays the Topics within the selected Category. Where a Hotspot has not been created a + is shown to the right of the Topic. To create a Hotspot for the Topic, click the + symbol. A new Hotspot area will be created in the image which can be moved and resized as required (any overlapping areas will be highlighted in red).
Related Images
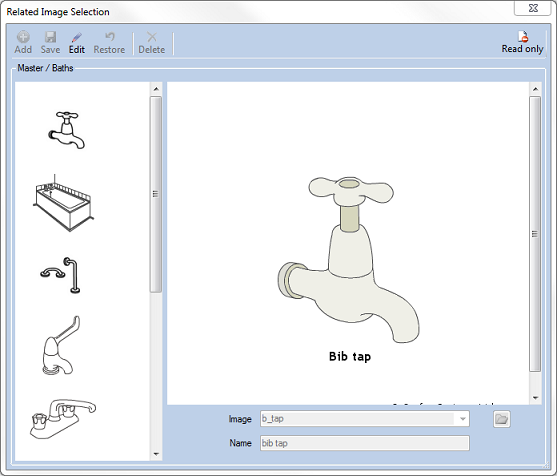
Keyfax Inter•View also provides a facility for Operators to view additional images appropriate to the selected Category. Click on Related Images to open the Related Images Selection in a new window.
Related Image selection
To edit the list of related images click on Edit on the Menu bar.
- Image - identifies the file name for the selected image. To view or select another image click on the folder icon.
- Name - the name for the image displayed to Operators
Topic Editing Pane
Allows you to edit the content of the Scripts by Topic.
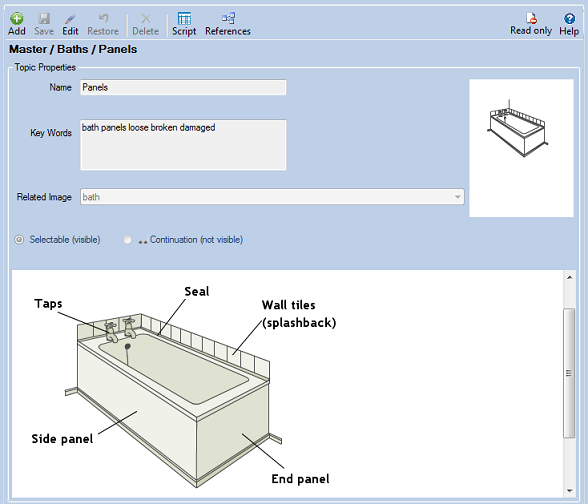
Topic Properties
Enables you to view and/or edit the selected Priority
- the Bread-crumb is displayed at the top of the Editing Pane.
- Name – the displayed name of the Topic
- Key Words – keywords used by the keyword search for Operators when looking for a Topic – use all words that might assist with the selection.
- Related Image – this is the image displayed to Operators in the viewing pane when they select the ‘Related Images’ tab. The drop-down list displays all images available for the Category. Any image selected will be shown as a thumbnail.
- Selectable (visible) – if this button is checked, the Topic is visible to Operators
- .. Continuation (not visible) – if this is checked, the Topic is not visible to Operators and would be used as a continuation Script, linked to a visible Script. Topics that have been set as Continuation (not visible) are displayed in the navigation pane with the leading ‘..’
Selection Images (Inter•View Online only)
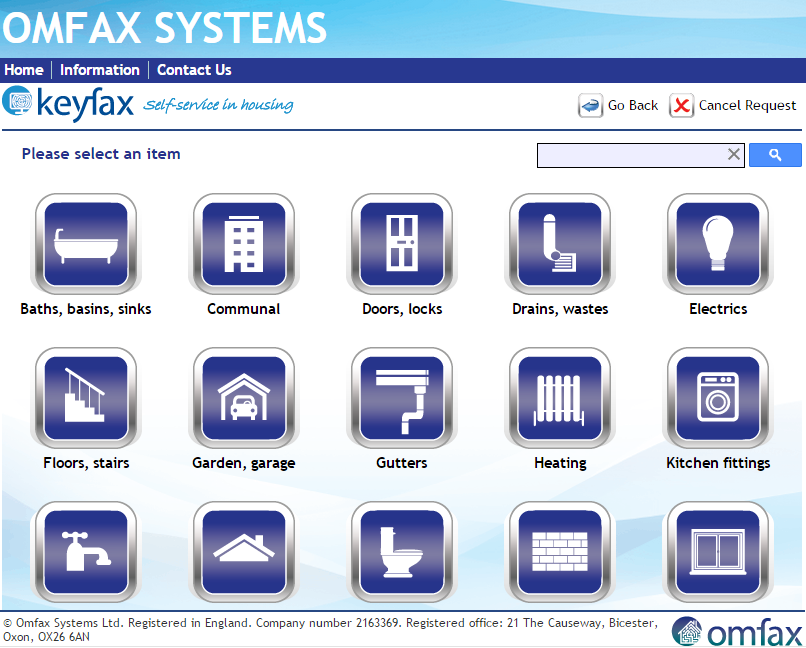
When using Keyfax Online tenants will be presented with icons to allow them to select the category that is most relevant to their repair or enquiry. The icons will be arranged with text below them as shown here.
To select a selection image for your category in Admin Tools, select the category you wish to edit, and click on the Edit button.
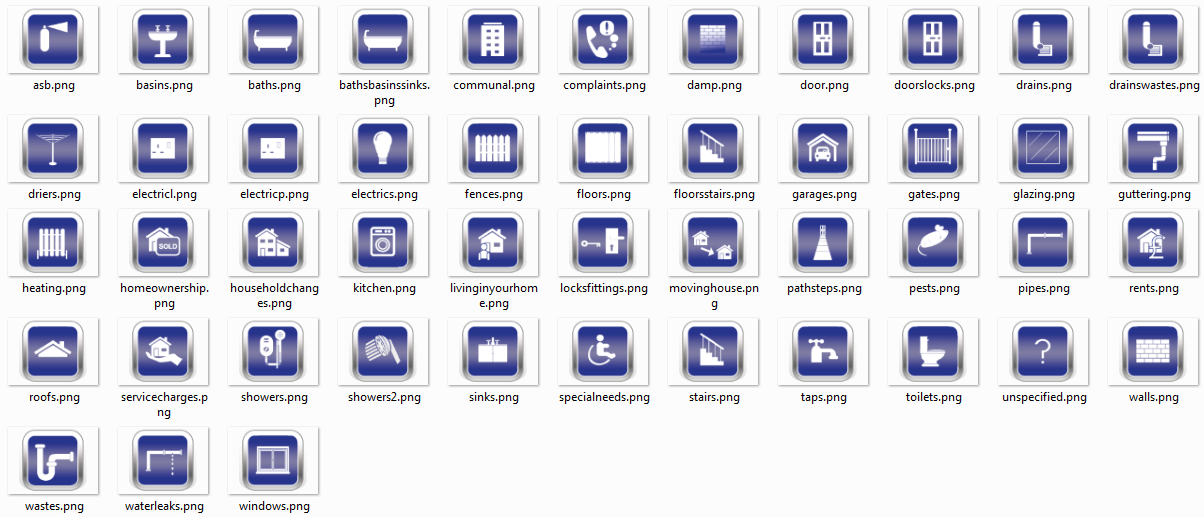
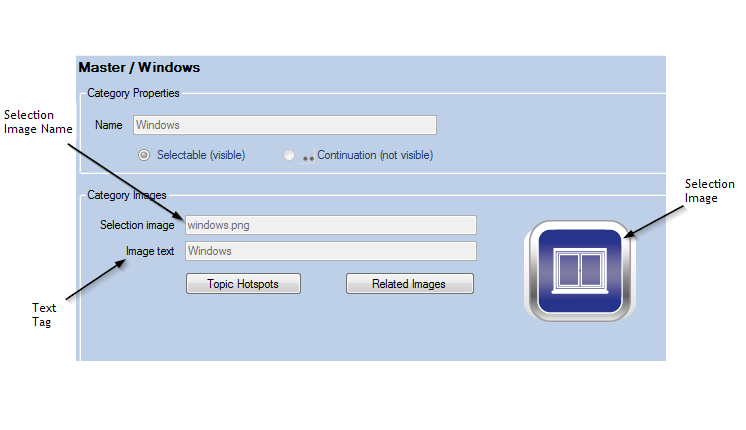
Enter the file name of the image into the Selection Image field and the text you wish to appear beneath the icon into the Image Text field. The default images and file names are as follows.
Additional Selection Images
Additional images will need to be uploaded to the selection images folder defined in your Keyfax config file.
Information on the format and dimensions of the images can be found at the following link:
